
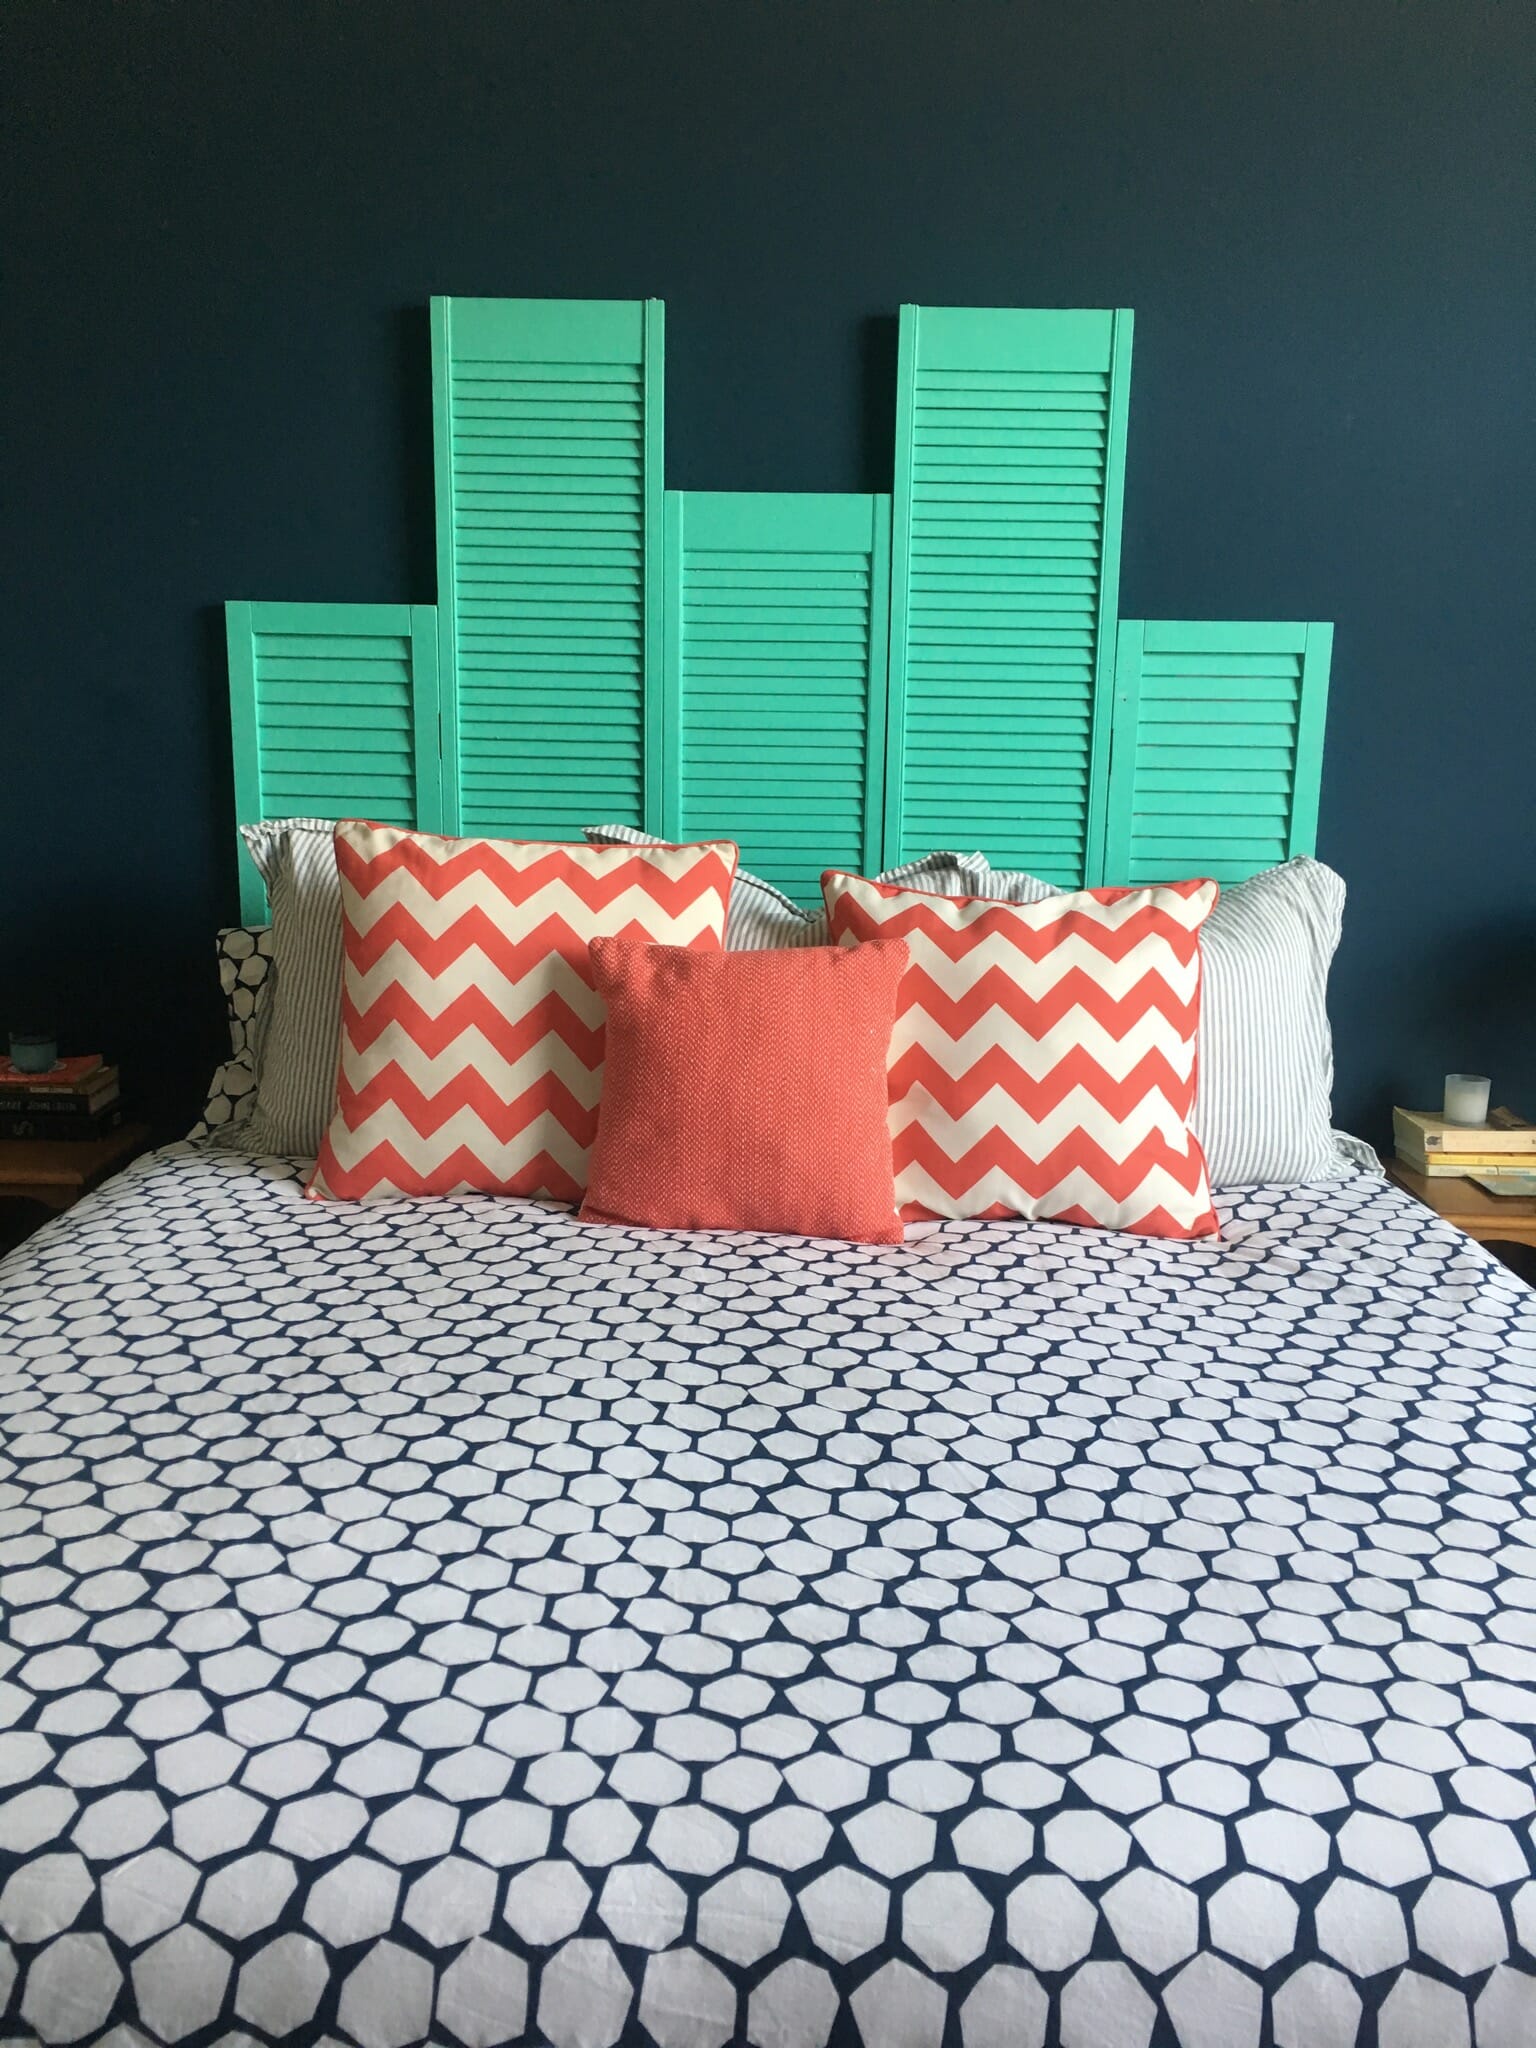
Brent and I decided it was time for a king sized bed. And I knew that I wanted to do something cool for our headboard. I had seen pictures of headboards made out of old doors, and I wanted to do something along the same lines. I then thought about using shutters to create a shutter headboard.
To start, I happened to have a pane of tall shutters at home and found a huge selection of others while shopping in Kansas City’s West Bottoms on First Fridays. I picked out three more, and it happened to be the perfect amount because all of them together are the same width as our bed.
Instructions for a Shutter Headboard
Here’s how it came together (you can find the detailed step-by-step instructions that we largely followed at HGTV.com). Super simple:
- They are different heights so I had to lay them out on the floor to figure out the best way to arrange them.
- I also measured the height of our bed so I would know where to place the shorter shutter (I did not want any wall showing).
- They were different colors too (a few a bright red). The red ones, I painted with Kilz first so it would be a better base coat. Our walls are a dark navy and I wanted a fun color that would pop next to the navy. I found a color combination that I liked from a magazine photo with orange and white bedding, navy walls, and a green headboard. We then went to Home Depot and found the Behr paint color Kauai.
- I painted the front and back of the shutters and then when they were totally dry, Brent and I hinged them together.
- We screwed them to the walls with anchors and places felt stickers to the corners to protect the walls.
- Here is the finished result…I’m pretty happy with how the shutter headboard turned out:
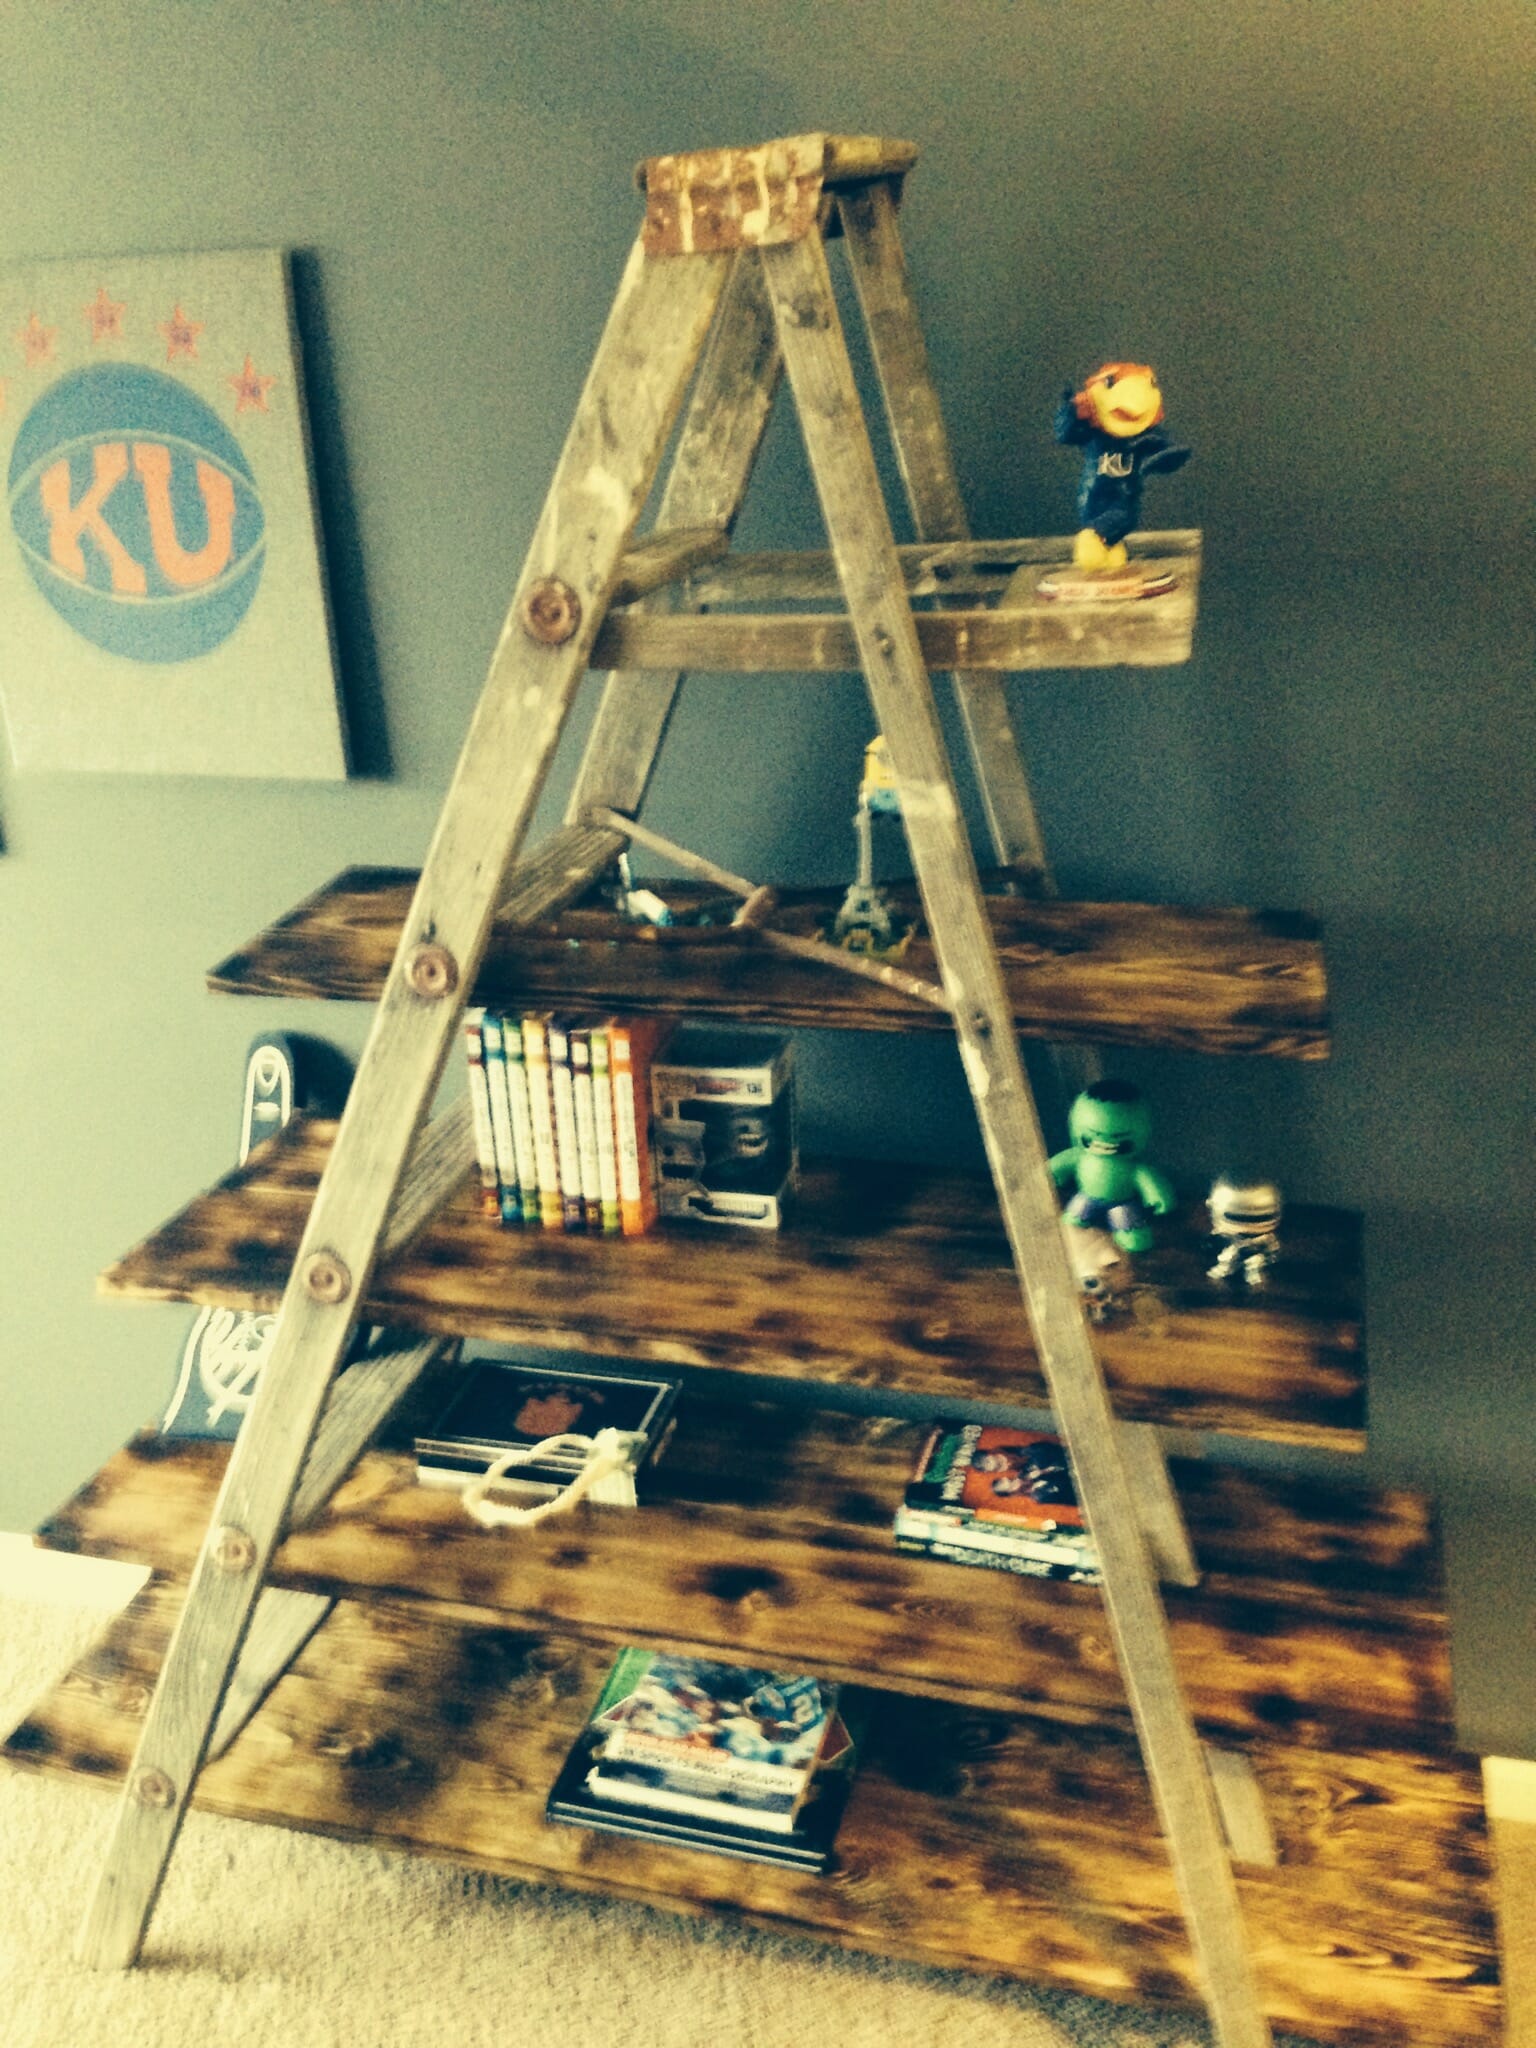
Bonus Project: Create a Ladder Bookshelf
Another project I worked on for the house was shelving for my son’s room. I saw projects where people transformed an old ladder into bookshelves and loved the idea.
I drove by a garage sale in our neighborhood one day and got an old rickety ladder for sale in the driveway. It was $8 … and now mine.
I needed to enlist some help from our handy friend Mark on the primary shelves. I gave him an idea of what I wanted: I didn’t want to lose any of the character of the ladder, wanting to see the steps and the small shelf for your paint can.
He brought back these amazing untreated cut planks of pine that would serve as the shelves. Mark suggested burning them and I thought that sounded pretty cool. He brought over a blow torch and I went to work. It gave them a rustic feel. I really liked how they turned out. I then put a couple coats of polyurethane to seal them. Here they are:


")


1 Comment
Pingback: How to Create Holiday Tablecloths on The Cheap | HeSaysSheSaysKC